Replacing Rear Brake Pads: When should you replace your rear brake pads? Is it better to have a professional change them?
When it comes to vehicle maintenance, few tasks are more important than ensuring your braking system is in good working order. The rear brake pads are one of the most important components of a brake system in terms of safety and performance.
If you’re considering replacing your rear brake pads, you’ve come to the right place! This detailed guide will lead you through the process, help you determine when it’s time for a replacement, and explore whether you should do it yourself or seek help from a professional.
Replacing Rear Brake Pads: When should you replace your rear brake pads? Is it better to have a professional change them?
7 Clear Indicators That It’s Time to Replace Your Rear Brake Pads
Being proactive with your vehicle’s brake system is critical for safe driving. Rear brake pads, like any other component of your braking system, wear out over time and need to be replaced. Here are seven noticeable indications that it’s time to change your rear brake pads, ensuring your safety and maintaining optimal vehicle performance.
Squeaking or Squealing Noises: One of the most common signs that your rear brake pads need replacement is when you hear a high-pitched squeaking or squealing sound when applying the brakes. This noise often comes from a wear indicator, a small metal tab designed to alert drivers that the brake pads are worn down. If you hear this sound, you should inspect your brake pads as soon as possible to avoid further damage.
Grinding Sounds: If you hear a grinding noise when you brake, it’s a serious indicator that your brake pads are completely worn out. This sound occurs when the metal backing plate of the brake pad makes contact with the rotor. Continuing to drive in this condition can cause significant damage to the rotors, leading to costly repairs. If you experience grinding sounds, replace your rear brake pads immediately.
Reduced Brake Responsiveness: If you find that your vehicle takes longer to stop or the brakes feel less responsive overall, it’s a sign that your rear brake pads may be worn. Reduced braking efficiency can increase stopping distances, posing a serious safety risk. If you notice any changes in how your brakes function, you should get them tested and, if required, replaced.
Vibration or Pulsation in the Brake Pedal: When you press the brakes, you may notice a vibration or pulsation in the brake pedal. This could suggest uneven wear on your brake pads or rotor issues. This can be caused by deformed rotors or worn pads that do not make consistent contact with the rotor surface. If you notice this sensation, you should inspect both the brake pads and the rotors for possible replacement.
Warning Light on Dashboard: Many modern vehicles come equipped with a brake warning light on the dashboard. If this light illuminates, it could indicate low brake pad material or other issues within the braking system. If you see this warning light, do not ignore it; check your brake pads and system immediately to ensure safe operation of your vehicle.
Brake Fluid Leak: Noticing brake fluid leaking near the wheels can be a sign of several issues, including worn brake pads. While this may not always directly relate to the pads themselves, it indicates that your braking system requires immediate attention. Low brake fluid levels can affect braking performance, so if you observe any leaks, have your brake system inspected right away.
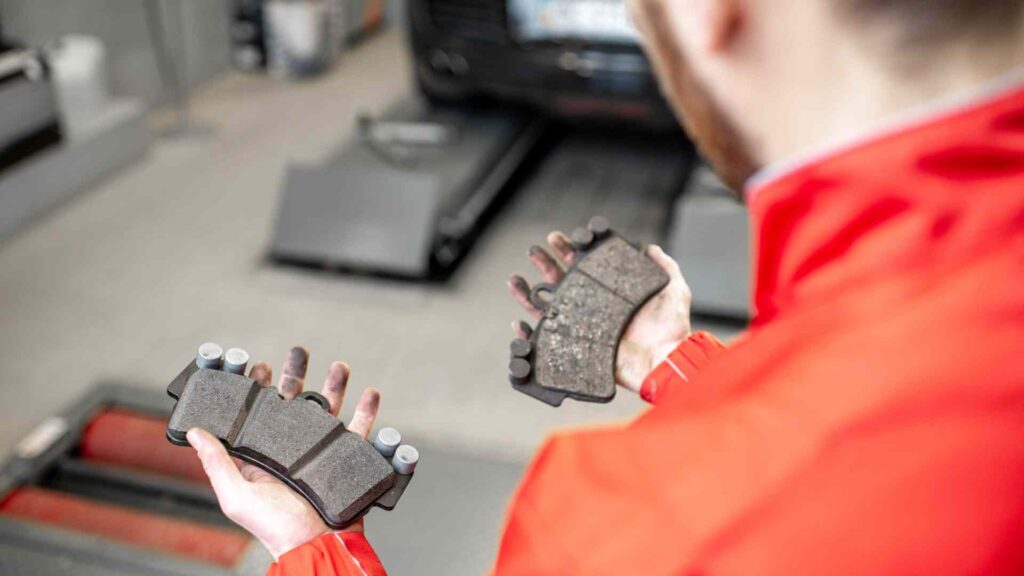
Physical Inspection Reveals Worn Pads: Regular visual examinations of your brake pads will help you detect wear before it becomes a serious problem. If you can see the pads through the spokes of the wheel, measure their thickness. If they are less than 1/4 inch thick, replace them. Many mechanics encourage examining your brake pads during routine maintenance to identify wear early.
Being aware of these seven indicators can help you maintain your vehicle’s braking system effectively. Regular inspections and prompt responses to warning signs will not only enhance your safety but also save you from costly repairs down the line. If you notice any of these signs, it’s time to consider replacing your rear brake pads to keep your vehicle running smoothly and safely. Always prioritize your safety and the safety of others on the road!
A Comprehensive Guide to Replacing Rear Brake Pads: Step-by-Step Instructions
Replacing rear brake pads is an essential vehicle maintenance task that can significantly enhance your vehicle’s safety and performance. While it may seem challenging if you’re not experienced with automotive repairs, this comprehensive guide will walk you through the process step-by-step. With the right tools and a bit of patience, you may successfully change your rear brake pads at home.
Tools and Materials You’ll Need
Before you start, gather the following tools and materials:
- New Rear Brake Pads: Choose high-quality pads suitable for your vehicle.
- Brake Cleaner: For cleaning the brake components.
- Jack and Jack Stands: To lift and secure the vehicle.
- Lug Wrench: To loosen and tighten lug nuts.
- Ratchet and Socket Set: For removing caliper bolts.
- Torque Wrench: To ensure proper tightening of bolts.
- C-Clamp or Brake Caliper Tool: To compress the caliper piston.
- Bungee Cord or Wire: To hang the caliper safely.
- Safety Glasses and Gloves: To protect yourself during the process.
Step 1: Safety First
Before working on your brakes, make safety a priority. Park your vehicle on a level surface and apply the parking brake. Protect yourself from dust and debris by wearing safety glasses and gloves.
Step 2: Loosen the Lug Nuts
Use the lug wrench to slightly loosen the lug nuts on the rear wheels. Do not entirely remove them at this point; instead, make them easier to unscrew once the vehicle is lifted.
Step 3: Raise the Vehicle
Lift the vehicle’s back using a jack until it’s high enough to set jack stands underneath. This step is critical for safety because it keeps the vehicle from tipping as you work on it.
Step 4: Remove the Rear Wheels
Once the vehicle is securely elevated, remove the lug nuts completely and take off the rear wheels. This will give you access to the brake components.
Step 5: Locate and Remove the Brake Caliper
Identify the brake calliper, which contains the brake pads. To remove the bolts that secure the calliper, use your ratchet and socket. Carefully slide the calliper off the rotor. Do not tug on the brake line; instead, support the calliper by hanging it from a bungee cord or wire.
Step 6: Remove the Old Brake Pads
You can now access the old brake pads after removing the calliper. They may be secured in place with clips or pins. Remove these components, then slide the old brake pads out of their slots. Take a time to check the brake rotor for signs of wear or damage.
Step 7: Compress the Calliper Piston
Before installing new brake pads, squeeze the calliper piston back into its housing. To complete this work, use a g-clamp or a brake calliper tool. Place the clamp over the piston and the back of the calliper, then tighten it until the piston is fully compressed. This step guarantees that there is adequate space for the larger, thicker brake pads.
Step 8: Install New Brake Pads
It is now time to install the replacement brake pads. Slide the replacement pads into the calliper bracket. Ensure that they fit snugly and are positioned correctly. If your new pads include a backing plate, be sure to fit them appropriately to reduce noise.
Step 9: Reattach the Brake Caliper
Carefully replace the calliper over the new brake pads and rotor. Reattach the previously removed calliper bolts and tighten to the manufacturer’s specifications with your torque wrench. This step is necessary to verify that the calliper is tightly fastened.
Step 10: Reattach the Wheel
With the calliper installed, it’s time to reinstall the wheel. Align the wheel to the hub and hand tighten the lug nuts. Once they are activated, lower the car back to the ground.
Step 11: Tighten the Lug Nuts
Once the vehicle is safely on the ground, use your torque wrench to tighten the lug nuts to the manufacturer’s requirements. This ensures that the wheel is securely attached to the hub.
Step 12: Test the Brakes
Before driving, pump the brake pedal a few times to seat the new brake pads against the rotor. This action ensures the brakes are functioning correctly. Check for any unusual noises or issues before hitting the road.
Final Checks
After completing the installation, it’s wise to take a short test drive to ensure everything feels right. Pay attention to the braking performance and listen for any strange sounds. If you notice anything unusual, recheck your installation to ensure everything is secure.
Remember that regular maintenance of your brake system is crucial for your safety and the longevity of your vehicle. Always remember that if you are unsure about any step of the process, do not hesitate to consult a skilled mechanic.
What is the Cost of Replacing Brake Pads? Is It Better to Have a Professional Change Them?
Understanding the cost of replacing brake pads and determining whether to do it yourself or hire a professional can make a big difference in your vehicle maintenance budget. In this section, we will delve into the various factors affecting brake pad replacement costs and help you weigh the pros and cons of DIY versus professional service.
Average Cost of Brake Pad Replacement
The cost of replacing brake pads can vary widely depending on several factors, including:
- Type of Vehicle: Luxury and high-performance vehicles often require specialized parts, which can drive up costs. Conversely, standard sedans or compact cars typically have lower replacement costs.
- Quality of Brake Pads: Brake pads come in various types—organic, semi-metallic, and ceramic. Higher-quality pads generally cost more but may offer better performance and longevity.
- Location: Labour rates differ by region and even by the specific repair shop. Urban areas often have higher labour costs compared to rural locations.
On average, you can expect to pay anywhere from $100 to $300 per axle for parts and labour. This estimate generally includes both the brake pads and the cost of installation.
Breaking Down the Costs
When budgeting for brake pad replacement, consider the following components:
- Parts: Brake pads typically cost between $50 and $150, depending on their type and brand. High-performance pads can be more expensive.
- Labor: The labour cost for replacing brake pads usually ranges from $75 to $150 per hour, with most jobs taking about one to two hours.
- Additional Services: If your rotors also need resurfacing or replacement, this will add to the overall cost. Resurfacing rotors can cost an additional $50 to $100 per rotor.
Is It Better to Have a Professional Change Them?
Choosing between DIY and professional brake pad replacement involves weighing the pros and cons of each approach.
Pros of DIY Replacement
Cost Savings: Replacing brake pads yourself can save you money on labour costs. If you’re handy and have the right tools, you may reduce the overall expense.
Learning Experience: Tackling brake maintenance can enhance your mechanical skills and give you a deeper understanding of your vehicle.
Flexibility: You can choose when to perform the work, fitting it into your schedule without relying on a shop’s availability.
Cons of DIY Replacement
Time-Consuming: If you’re not experienced, the process can take longer than expected. Mistakes can lead to further delays or costly repairs.
Safety Risks: Brakes are critical for safety. If you’re unsure about any step of the process, it can lead to improper installation, risking your safety and that of others.
Lack of Warranty: Professional services often come with warranties on parts and labour, providing peace of mind. DIY replacements typically do not have such coverage.
Pros of Professional Replacement
Expertise: Professional mechanics have the training and experience to ensure the job is done correctly and safely, minimizing the risk of future issues.
Comprehensive Inspection: Many mechanics will inspect other brake components, such as rotors and callipers, during the replacement process, identifying any additional issues that may need attention.
Convenience: Having a professional do the work saves you time and effort, allowing you to focus on other tasks.
Cons of Professional Replacement
Higher Costs: Hiring a professional will almost always be more expensive than doing the work yourself, especially if you have multiple brake components that need replacement.
Scheduling Inconveniences: You may have to wait for an appointment, which can delay getting your vehicle back on the road.
Special Considerations
Warranty and Insurance: If your vehicle is still under warranty, check if brake pad replacement is covered. Some insurance policies may also cover part of the costs depending on your plan.
Local Dealerships vs. Independent Shops: Prices can vary significantly between dealerships and independent repair shops. Dealerships may charge more for labour but often use OEM parts, while independent shops may offer competitive pricing and flexibility.
Whether to tackle this task yourself or hire a professional depends on your mechanical skills, budget, and the importance of ensuring safety. Replacing rear brake pads is an essential maintenance task that ensures your vehicle remains safe and efficient.
By understanding the step-by-step process, recognizing the signs you need to replace brake pads, and weighing the pros and cons of doing it yourself versus hiring a professional, you’re better equipped to make informed decisions about your vehicle’s care. Remember that a well-maintained braking system is critical not only for your own safety but also for the protection of everyone on the road. Whether you choose to tackle this task yourself or seek professional help, staying proactive about brake maintenance will keep your vehicle running smoothly for years to come!
When it comes to regular vehicle maintenance, choosing a qualified and reputable mechanic is essential. Look for a mechanic who is certified, experienced, and uses high-quality parts and fluids.
YST Auto Service is an excellent choice for professional vehicle maintenance. Our dedication to quality, convenience, and customer satisfaction makes us an outstanding choice for drivers looking for vehicle maintenance. With a team of qualified technicians, a wide range of services, and an emphasis on fair pricing and sustainable techniques, YST Auto Service is well-equipped to handle your vehicle maintenance needs promptly and professionally.
Remember, vehicle maintenance is an investment in your vehicle’s longevity, performance, safety, and value. By following the recommended service schedule and choosing a qualified mechanic, you can ensure that your car stays in top condition and provides you with reliable and safe transportation for years to come.


