DIY Tire Maintenance: 4 Tips to Prolong the Life of Your Tires
Maintaining your vehicle’s tires is very important not only for ensuring safety but also for extending their lifespan. Tires are the only contact point between your vehicle and the road, and their condition significantly impacts fuel efficiency, handling, and overall driving performance.
Ignoring tire maintenance can result in early wear, reduced traction, and even blowouts, posing major risks to you and your passengers. In this article, we will explore five simple steps in DIY tire care that can help you prolong the life of your tires, ensuring a smoother and safer ride.
YST Auto Service is an excellent choice for professional car maintenance. Our dedication to quality, convenience, and customer satisfaction makes us an outstanding choice for drivers looking for regular car servicing. With a team of qualified technicians, a wide range of services, and an emphasis on fair pricing and sustainable techniques, YST Auto Service is well-equipped to handle your car maintenance needs promptly and professionally.
Remember, regular car servicing is an investment in your vehicle’s longevity, performance, safety, and value. By following the recommended service schedule and choosing a qualified mechanic, you can ensure that your car stays in top condition and provides you with reliable and safe transportation for years to come.
DIY Tire Maintenance: 4 Tips to Prolong the Life of Your Tires
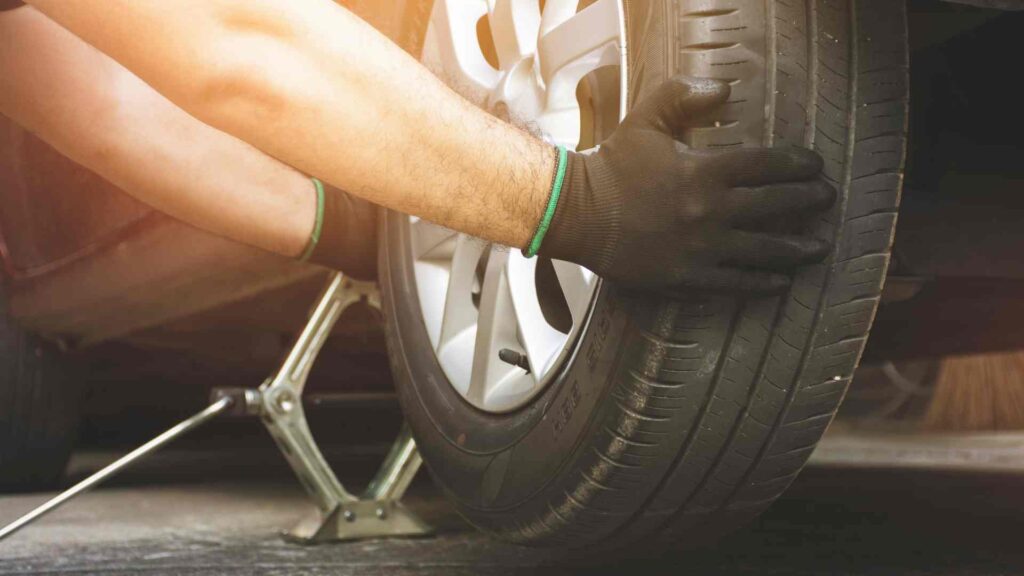
Visually Inspect Your Tires
Regularly visually inspecting your tires is a fundamental aspect of DIY tire maintenance that can help you identify potential problems before they escalate into serious issues. This simple practice can save you time, and money, and enhance your safety on the road.
Here’s a detailed guide on what to look for during your tire inspections.
Check Tread Depth
The tread depth of your tires is crucial for maintaining traction, especially in wet or slippery conditions. Worn-out tires can lead to hydroplaning and longer stopping distances, posing a significant safety risk. To check the tread depth, you can use the penny test:
Insert a penny into the tread grooves with Queen Elizabeth’s crown facing down. If you can see the top of the Queen’s crown, your tire is below 2/32″, and it’s time for a tire replacement in Toronto. Ideally, your tread depth should be at least 2/32 of an inch for safe driving conditions.
Inspect for Uneven Wear Patterns
Uneven tire wear can indicate underlying issues such as misalignment, improper inflation, or suspension problems. Common signs of uneven wear include:
Inner or Outer Edge Wear: This may indicate misalignment or improper inflation. Check if one side of the tire has more wear than the other.
Center Wear: If the center of the tire tread is more worn than the edges, it could mean the tire is over-inflated.
Scalloping or Cup-like Patterns: These irregularities can signal a need for wheel balancing or suspension repairs.
Addressing these issues promptly can help extend tire life and improve overall vehicle handling.
Examine Sidewalls for Damage
The sidewalls of your tires are vulnerable to cuts, punctures, and bulges. Inspect them for:
Cracks or Cuts: Look for any visible damage, as these can compromise the tire’s integrity. If you notice any cuts that penetrate the rubber, consult a professional to determine if the tire is still safe to use.
Bulges or Blisters: These can indicate a weak spot in the tire, often caused by hitting a pothole or curb. Bulges can lead to blowouts, so it’s essential to replace any tires exhibiting this condition.
Look for Foreign Objects
During your inspection, check for any foreign objects lodged in the tread, such as nails, screws, or stones. These objects can lead to slow leaks or punctures. If you find an object embedded in your tire:
Assess the Situation: If it’s a small nail or screw and the tire isn’t losing air, you may be able to leave it in until you can have it repaired. However, if the object is large or causing a noticeable leak, it’s crucial to address it immediately.
Consult a Professional: Even if the tire appears to be holding air, it’s wise to have it inspected by a tire professional to ensure it can be safely repaired.
Check Valve Stems
The valve stems are critical components that allow you to inflate your tires. Inspect them for:
Cracks or Damage: A damaged valve stem can lead to air leaks, causing tire pressure issues. If you notice any signs of deterioration or damage, replace the valve stem promptly.
Secure Caps: Ensure the valve caps are present and secure. These caps help prevent dirt and moisture from entering the valve, which can affect tire pressure.
Visually inspecting your tires is a simple yet effective way to maintain their reliability and prolong their lifespan. To maximize the benefits of tire inspections, make it a habit to check your tires at least once a month and before long trips. This proactive approach allows you to identify any issues early on, ensuring that your tires remain in good condition.
Check Your Tire Pressure
Maintaining the proper tire pressure is an important aspect of DIY tire maintenance because it affects both the performance of your vehicle and the longevity of your tires. Properly inflated tires not only increase safety but also improve fuel efficiency and driving comfort.
Here’s a comprehensive guide on how to effectively check and maintain your tire pressure.
Understanding Tire Pressure
Tire pressure affects various aspects of vehicle performance, including:
Fuel Efficiency: Under-inflated tires create more rolling resistance, requiring your vehicle to expend more energy to move, which can lead to decreased fuel economy.
Tire Wear: Incorrect tire pressure can lead to uneven wear patterns. Under-inflation causes the edges of the tire to wear more quickly, while over-inflation can lead to excessive wear in the center of the tread.
Safety: Tires that are not properly inflated can compromise handling and braking performance, increasing the risk of accidents. In extreme cases, under-inflated tires can overheat and lead to blowouts.
Finding the Recommended Tire Pressure
To maintain optimal tire pressure, it’s essential to know the manufacturer’s recommended levels. This information can typically be found in:
Owner’s Manual: Your vehicle’s owner’s manual will provide detailed specifications for tire pressure.
Driver’s Side Door Jamb: Most vehicles have a sticker located on the driver’s side door frame, listing the recommended tire pressures for both front and rear tires.
It’s important to note that the recommended tire pressure is usually specified in psi (pounds per square inch) and may vary between the front and rear tires.
Tools Needed for Checking Tire Pressure
To check your tire pressure accurately, you will need the following tools:
Tire Pressure Gauge: A reliable tire pressure gauge is essential for accurate readings. Options include digital, dial, and stick gauges, each with its own advantages. Digital gauges are often easier to read, while dial gauges can provide quick visual feedback.
Air Compressor: If your tires are low on air, you’ll need an air compressor to inflate them. Many gas stations have air pumps available, or you can invest in a portable air compressor for home use.
How to Check Tire Pressure
Follow these steps to check your tire pressure effectively:
Ensure Tires Are Cold: Tire pressure should be checked when the tires are cold, typically after the vehicle has been parked for a few hours. Driving heats up the tires and can temporarily increase the pressure, leading to inaccurate readings.
Remove Valve Caps: Start by removing the valve caps from each tire’s valve stem, placing them in a safe location to avoid losing them.
Press the Gauge onto the Valve Stem: Firmly press the tire pressure gauge onto the valve stem to get a reading. Ensure that you create a tight seal to prevent air from escaping, which could result in an inaccurate measurement.
Read the Gauge: Check the reading on the gauge. If you are using a digital gauge, the reading will display automatically. For dial or stick gauges, take note of where the pointer is indicating.
Compare with Recommended Pressure: Compare your readings to the manufacturer’s recommended tire pressure. If the reading is lower than recommended, you will need to inflate the tire. If it is higher, you may need to release some air.
Inflating Your Tires
If your tires are under-inflated, follow these steps to inflate them:
Locate an Air Compressor: Find an air compressor, either at a gas station or use a portable one at home.
Inflate the Tire: Attach the air hose to the valve stem and add air until you reach the recommended pressure. Periodically check the pressure with your gauge to avoid overinflation.
Replace Valve Caps: After inflating, ensure you replace the valve caps securely to protect the valve stems from dirt and moisture.
Regularly checking your tire pressure is an important part of DIY tire maintenance since it improves safety, increases fuel efficiency, and extends the life of your tires. Incorporate tire pressure checks into your regular vehicle maintenance routine. Check your tire pressure at least once a month, especially before long trips. Seasonal changes can also affect tire pressure, so be particularly vigilant during extreme temperature fluctuations.
Rotate Your Tires
Tire rotation is an important part of tire maintenance because it promotes even wear, improves vehicle performance, and extends the lifespan of the tires. Tires on your vehicle experience different levels of wear depending on their position and the weight distribution of the vehicle. Here are some key reasons why regular tire rotation is essential:
Even Wear Distribution: Different tires wear at different rates based on their location. For instance, front tires often wear faster due to the added weight of the engine and the steering forces they experience. Rotating your tires helps balance out wear patterns, ensuring all tires wear evenly over time.
Improved Handling and Performance: Uneven tire wear can lead to handling issues, such as pulling to one side or diminished traction. Regular rotation helps maintain consistent grip and handling characteristics, providing a safer and more comfortable driving experience.
Extended Tire Lifespan: By promoting even wear, tire rotation can help maximize the life of your tires. This means fewer tire replacements over time, leading to long-term cost savings.
When to Rotate Your Tires
The frequency of tire rotation can vary based on several factors, including your vehicle type, tire type, and driving conditions. Here are general guidelines for determining when to rotate your tires:
Mileage Recommendations: Most experts recommend rotating your tires every 5,000 to 8,000 kilometers. However, consult your vehicle’s owner’s manual for specific recommendations tailored to your make and model.
Visual Inspection: If you notice signs of uneven wear during your visual inspection, such as bald spots or significant wear on one tire compared to others, it may be time for a rotation regardless of the mileage.
Seasonal Changes: If you switch between winter and summer tires, ensure to rotate them during the changeover. This practice helps maximize wear balance for both sets of tires.
How to Rotate Your Tires
Rotating your tires can be a straightforward DIY task if you have the right tools and follow these steps:
Gather Necessary Tools: You will need a jack, jack stands, a lug wrench, and a tire pressure gauge. Ensure your vehicle is parked on a flat, stable surface before beginning.
Loosen Lug Nuts: Before raising the vehicle, slightly loosen the lug nuts on all four tires using the lug wrench. Do not remove them completely at this stage, as this will be easier with the tires still on the ground.
Lift the Vehicle: Use the jack to raise the vehicle, placing it securely on jack stands. Ensure that the vehicle is stable before proceeding.
Remove Tires: Once the vehicle is lifted, remove the lug nuts completely and take off the tires. Keep the lug nuts in a safe place for reinstallation.
Rotate the Tires: Depending on your vehicle’s drivetrain (front-wheel drive, rear-wheel drive, or all-wheel drive), follow the appropriate rotation pattern:
- Front-Wheel Drive: Move the front tires to the rear, and the rear tires to the front, switching sides (e.g., left rear to right front and right rear to left front).
- Rear-Wheel Drive: The process is similar but in reverse; move the rear tires to the front, switching sides as well.
- All-Wheel Drive: Follow the front-wheel drive pattern, or consult your owner’s manual for specific recommendations.
Reinstall Tires: Once the tires are in their new positions, place the lug nuts back on and hand-tighten them to secure the tires.
Lower the Vehicle: Carefully lower the vehicle back to the ground using the jack.
Tighten Lug Nuts: After lowering, use the lug wrench to tighten the lug nuts in a crisscross pattern to ensure even tightening. This step is crucial for maintaining the integrity of the wheel mounting.
Post-Rotation Check
After rotating your tires, check the tire pressure to ensure all tires are inflated to the recommended levels. Additionally, take note of any unusual sounds or vibrations during your first drive after rotation, as these could indicate issues that need further inspection.
Professional Assistance
If you’re uncomfortable performing a tire rotation yourself or lack the necessary tools, consider visiting a professional service center. Many tire shops offer rotation services at a reasonable price, often included with tire purchases.
Regularly rotating your tires is an important part of DIY tire maintenance since it promotes even wear, improves vehicle handling, and increases tire life. Understanding when and how to rotate your tires will help keep your car safe and efficient on the road. Make tire rotation a frequent part of your maintenance schedule to enjoy a smoother ride and extend the life of your tires.
Get Wheel Alignment and Balancing Done
Proper wheel alignment and balancing are crucial components of tire maintenance that significantly affect your vehicle’s performance, safety, and tire lifespan.
Wheel alignment refers to the adjustment of the angles of the wheels so that they are set to the vehicle manufacturer’s specifications. Proper alignment ensures that your tires make optimal contact with the road, promoting even wear and improving handling. Here are key points regarding wheel alignment:
Alignment Angles: The primary angles to consider are camber (the tilt of the wheel), caster (the angle of the steering axis), and toe (the angle at which the tires point in relation to the vehicle’s centerline). Misalignment can occur due to various factors, including hitting potholes, curbs, or regular wear and tear.
Signs of Misalignment: Be vigilant for signs that your vehicle may need an alignment. Common indicators include uneven tire wear, your vehicle pulling to one side, or a steering wheel that is off-center when driving straight. Addressing misalignment promptly can prevent further tire damage and enhance safety.
Understanding Wheel Balancing
Wheel balancing involves equalizing the weight distribution around the entire wheel and tire assembly. Proper balancing ensures that tires rotate smoothly and prevents vibrations that can lead to uneven wear or mechanical problems. Here are some critical points regarding wheel balancing:
Importance of Balancing: Unbalanced tires can cause vibrations in the steering wheel, seat, or floorboard, particularly at higher speeds. This not only affects driving comfort but can also lead to premature wear of suspension components.
Signs of Imbalance: If you feel shaking or vibrations when driving, especially at high speeds, it could be because your tires are uneven. Regular balancing checks are crucial, especially after installing new tires or noticing any changes in driving dynamics.
When to Get Alignment and Balancing
Knowing when to seek wheel alignment and balancing services is vital for maintaining optimal tire performance:
After Installation: Always have your wheels aligned and balanced when installing new tires. This ensures that your new tires wear evenly from the start.
Periodic Maintenance: Many experts recommend checking wheel alignment and balancing every 10,000 to 15,000 kilometers or during regular maintenance intervals. This proactive approach helps prevent issues before they escalate.
Following Impact: If you’ve recently hit a pothole, or curb, or experienced a significant jolt, it’s wise to have your alignment and balance checked. These impacts can easily throw your wheels out of alignment.
The Alignment and Balancing Process
While you can monitor tire wear and performance at home, the actual alignment and balancing processes should be performed by professionals using specialized equipment. Here’s what to expect:
Inspection: A technician will begin by inspecting your vehicle’s suspension components and tires for any signs of damage or wear.
Alignment Adjustment: Using a computerized alignment machine, the technician will measure the angles of your wheels. If adjustments are needed, they will adjust the tie rods, control arms, or other components to align the wheels to manufacturer specifications.
Balancing Procedure: For balancing, the technician will mount the tires on a balancing machine, which spins the wheel to identify any imbalances. Weights are then added to the rim to ensure even weight distribution.
Final Checks: After alignment and balancing, the technician may perform a test drive to ensure that the vehicle handles correctly and that no vibrations are present.
Choosing a Service Provider
When selecting a service provider for alignment and balancing, consider the following:
Reputation and Experience: Look for a reputable shop with experienced technicians. Online reviews and recommendations can provide valuable insights.
Equipment Quality: Ensure that the facility uses modern, computerized alignment and balancing equipment, as this enhances accuracy and efficiency.
Warranty and Services Offered: Inquire if the shop offers any warranties on their work or additional services such as tire rotation or inspection.
Getting your wheels aligned and balanced regularly is a vital part of a comprehensive tire maintenance strategy. Make alignment and balancing a priority in your DIY tire care routine to enjoy a smoother, safer ride and extend the life of your tires.
Important Seasonal Considerations
Seasonal changes can have a significant impact on tire performance and longevity. Different weather conditions affect tire traction, pressure, and overall wear, making it essential to adjust your tire maintenance routine accordingly.
Here’s a detailed look at how to prepare your tires for the changing seasons and maximize their effectiveness.
Winter Considerations
As temperatures drop, tire performance is affected in several ways. Here are key points to consider during the winter months:
Switch to Winter Tires: If you live in an area that experiences harsh winters in Canada, consider investing in winter tires designed for cold weather conditions. These tires have specialized tread patterns and softer rubber compounds that enhance grip on snow and ice.
Monitor Tire Pressure: Cold temperatures can cause tire pressure to drop. It’s essential to check your tire pressure regularly during winter months, as under-inflated tires can reduce traction and increase the risk of hydroplaning.
Inspect for Damage: Winter conditions can be tough on tires. Regularly check for signs of damage, such as cracks or punctures, which can occur due to cold temperatures and road debris.
Spring Considerations
Spring brings its own set of challenges and opportunities for tire maintenance:
Switch Back to All-Season or Summer Tires: If you’ve used winter tires, transition back to all-season or summer tires once the threat of snow and ice has passed. This switch ensures optimal performance in warmer temperatures.
Check for Wear from Winter: Inspect tires for any signs of wear that may have occurred during the winter months, such as uneven wear patterns or damage from road salt. Address any issues promptly to ensure safety and extend tire life.
Clean Tires Thoroughly: After a winter of exposure to road salt and grime, give your tires a thorough cleaning to remove any corrosive materials that could lead to deterioration.
Summer Considerations
During the warmer months, specific maintenance tasks become crucial:
Monitor Tire Pressure More Frequently: Heat can cause tire pressure to rise. Check your tire pressure regularly to ensure that it remains within the recommended levels, as over-inflated tires can lead to reduced traction and a harsher ride.
Inspect for UV Damage: Prolonged exposure to sunlight can cause the rubber to degrade over time. Regularly inspect your tires for signs of cracking or fading, and consider applying a tire protectant to shield them from UV rays.
Stay Alert for Overheating: If you plan on taking long road trips during the summer, be mindful of tire temperatures. Excessive heat can lead to blowouts, so check your tires before long drives and ensure they are properly inflated.
Fall Considerations
As autumn approaches, it’s essential to prepare for the transition to colder weather:
Check Tread Depth: With wet leaves and changing road conditions, ensure your tires have adequate tread depth for safe driving. The penny test can help determine if your tread is still sufficient for fall driving conditions.
Watch for Temperature Changes: As temperatures drop, monitor tire pressure closely, as cooler air can cause pressure to decrease. Adjust your tire pressure accordingly.
Inspect for Debris: Autumn often brings falling leaves and debris, which can accumulate in tire treads. Regularly clean your tires and inspect them for any trapped debris that could affect performance.
Storage Considerations
If you switch between seasonal tires, proper storage is essential to maintain their condition:
Clean and Dry Storage: Store off-season tires in a cool, dry place away from direct sunlight. Ensure they are clean and dry to prevent mould and deterioration.
Stacking or Hanging: Store tires vertically or stacked flat to avoid distortion. If possible, use tire racks or hang them to maintain their shape.
Use Tire Covers: If storing for an extended period, consider using breathable tire covers to protect them from dust and UV exposure while allowing moisture to escape.
Implementing these simple steps in your DIY tire maintenance routine can significantly prolong the life of your tires, and you can enjoy a smoother ride, improved fuel efficiency, and peace of mind knowing that your tires are in top condition. Remember that proactive maintenance not only extends tire life but also contributes to overall vehicle performance. If you’re in need of a tire change in Toronto or have specific concerns about your tires, don’t hesitate to consult professionals like YST Auto Service for expert advice and services.
Keep in mind that your car is a major investment, so consider taking your car to YST Auto Service for a full car inspection. YST Auto Service is your one-stop destination auto repair garage in Mississauga, Toronto. Our professional mechanics can identify potential issues and ensure your vehicle is ready for the changing season.
YST Auto Service is an excellent choice for professional car maintenance. Our dedication to quality, convenience, and customer satisfaction makes us an outstanding choice for drivers looking for regular car servicing. With a team of qualified technicians, a wide range of services, and an emphasis on fair pricing and sustainable techniques, YST Auto Service is well-equipped to handle your car maintenance needs promptly and professionally.
At YST Auto Service, we deliver only the highest quality car services and repairs. We provide all manner of auto repair and car maintenance services to keep your vehicle running strong and smooth. From keeping proper tire traction to ensuring your battery is up to the task, these tips will help you enjoy the autumn drive with confidence and comfort.


